| Order 750 checklists in MS Word and PDF printable format at $49.99 USD only. |
BUY NOW!  |
Connect to database in Configurator
CentriQS Configurator is a database configuration tool that lets manage database components and also create, delete, update, back up and restore databases. To connect to your existing database via Configurator, do the following steps:
- Start Configurator and connect to the server which keeps your database (authentication is required)
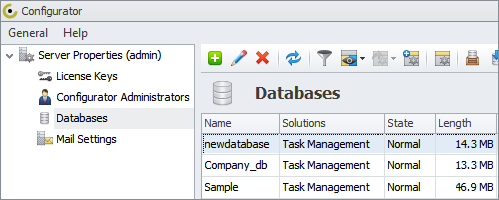
- To view the summary of your database (name, file size, type, state, etc.), select the Databases option under Server Properties
- Use the Mail Settings option to enter settings for SMTP Mail Server or MS Exchange Server
- Use the Configurator Administrators option to manage administrators of CentriQS Configurator
- Connect to your database (authentication is required)
Set database options
After you connect to your database you can begin to manage the database options. Do these steps:
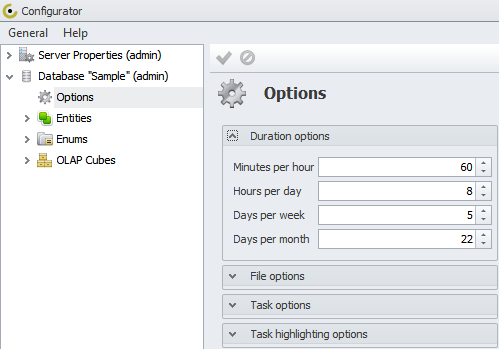
- Select the Options item under Database
- In the Duration options, enter custom durations for hour, day, week, month. For example, you can set 8 hours per day.
- In the File options, set maximum size of files which you can upload to your db
- In the Task options, enter auto-assignment settings
- In the Task highlighting options, enable or disable auto-highlighting of tasks
Add entities and set their properties
Your database includes default entities (e.g. Appointment, Task, Project, etc.) with a number of default properties. If needed, you can create custom entities in your db and specify custom properties. To create a new custom entity and set its properties, do the following:
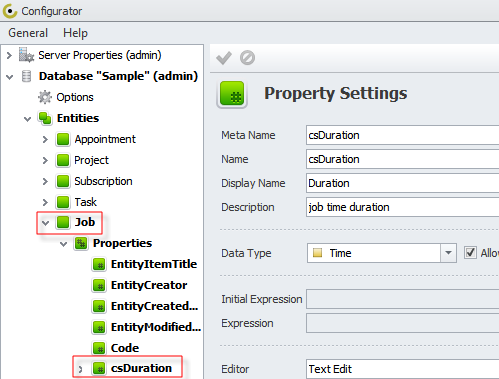
- Select the Entities option, right-click on it and select "Add new entity". For example, you add the custom entity "Job"
- Specify the fields of your new entity and save the changes
- To add a new property, click on your new entity to expend it, right-click on Properties, and select "Add property". For example, you add the property "Duration"
- Specify the fields of your new property and save the changes
Set workflow
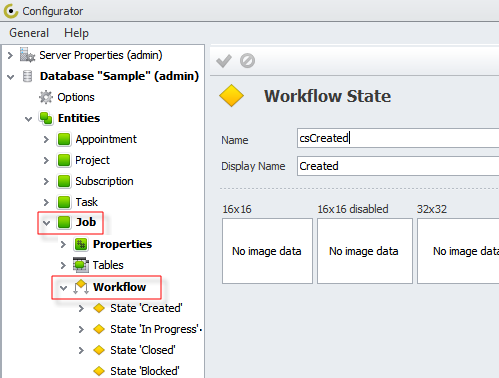
Workflow lets create a sequence of steps that comprise a certain process. For example, for the custom entity "Job" there can be a job management process that consists of such steps as "Created", "In Progress", "Closed", "Blocked", etc. To create workflow for your entity, do the following:
- Expend the entity "Job", right-click on Workflow and select Add State
- Specify the details of your Workflow State
- Add Transitions to your Workflow State
- Add Reasons to your Workflow State
- Add Actions to your Workflow State
Create Tables
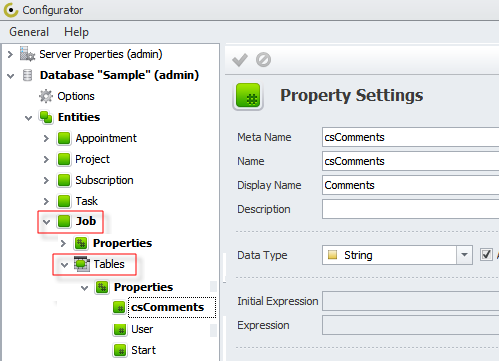
By using Tables in your custom database you can better organize your entitiesâ view and make calculations in table columns and rows. To create a table for your entity, do the following:
- Right click on Tables and select Add Table
- Specify the details of your table
- To add a new property to your table, right-click on it and select Add Property
- Specify the details of your table property
Create enums
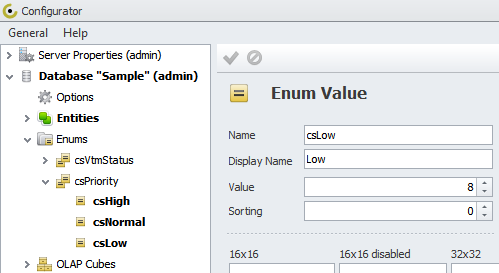
Enums let you add enumerated values to your entities. For example, you can add priority values "Low", "High" and "Normal" to your custom entity "Job". Â Do the following steps:
- Right click on Enums, select Add Enum and enter name for your new enum
- Right click on for your new enum and select Add Enum Item
- Specify the details for your enum item
Add OLAP cube
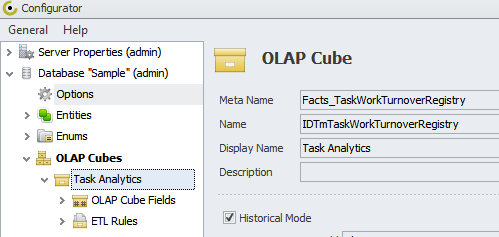
OLAP cubes allow you to create analytics for calculating entity data. To create OLAP cube, do the following:
- Right click on OLAP cubes and select Add OLAP Cube
- Enter the detail of your OLAP cube
- Specify the fields and rules of your OLAP cube
| Order 750 checklists in MS Word and PDF printable format at $49.99 USD only. |
BUY NOW!  |
|